Call us Mon-Fri 7am-4pm

1300 199 480

Fill in the fields, we’ll contact you

Name(Required)
Shower Screen Replacement Cost on the Gold Coast Complete Guide

Shower Screen Replacement Cost on the Gold Coast: Complete Guide

The cost to replace a shower screen on the Gold Coast depends on screen type (framed, semi-frameless, or frameless), glass area, hardware finish, and site conditions discovered during removal β€” including waterproofing status, tile condition, and high-rise access logistics. Most quotes cover all known costs upfront. However, waterproofing issues found during removal are an unforeseen cost that cannot be quoted before the old screen comes down β€” they only become visible once removal is complete. Understanding what drives the price β€” and what can add to it unexpectedly β€” is the most practical preparation before booking a shower screen replacement gold coast quote.

What Affects the Cost of Shower Screen Replacement on the Gold Coast?

Six factors determine the price of a shower screen replacement on the Gold Coast. The first three are known before the job starts. The last three may only become clear during or after removal of the existing screen.

Known Before the Job

  • Screen type β€” framed screens sit at the lower end of the price range. Semi-frameless screens are mid-range. Frameless screens β€” which use 10mm toughened glass, precision marine-grade hardware, and require two installation visits for hinged door configurations β€” sit at the premium end. The price difference between semi-frameless and frameless is meaningful, and the right choice depends on your bathroom conditions as much as your budget.
  • Glass area β€” custom glass is priced by the square metre. A 900mm shower opening and a 1,200mm opening require different amounts of glass. Door panels, fixed panels, and return panels all add glass area. The measure appointment confirms the exact glass area for your specific opening.
  • Hardware finish β€” chrome is the most accessible price point. Matte black, brushed nickel, and brushed gold carry a modest premium due to the additional powdercoating or PVD finishing process. For coastal Gold Coast suburbs β€” Surfers Paradise, Broadbeach, Mermaid Beach, Burleigh Heads, Coolangatta β€” brass or marine-grade stainless steel hardware (grade 316) is the correct specification and adds a small cost over standard grade 304 hardware. That cost is significantly less than replacing corroded hardware in three years.

Potentially Discovered During Removal

  • Waterproofing condition β€” if the existing screen has been leaking, or if the original waterproofing membrane is now 30–40 years old (common in Gold Coast homes and apartments built in the late 1980s and early 1990s), removal may expose membrane failure that must be repaired before the new screen can be installed. This adds both time and cost, and the extent cannot be known until the old screen is off the wall.
  • Tile condition β€” in older Gold Coast bathrooms where the original screen frame was bonded directly to the tiles, removal can lift tiles with the frame. If the tiles are in a discontinued range β€” common in bathrooms from the 1980s β€” sourcing matching replacements may be impossible, requiring a larger retiling area than the damage itself.
  • Access conditions β€” apartment buildings in Surfers Paradise, Broadbeach, Helensvale, Robina, and Southport may require advance lift booking, strata notification, and coordinated glass delivery. These logistics are factored into the original quote when advised at booking β€” but access constraints discovered on installation day that were not disclosed in advance can affect scheduling and cost.

How Much Does a Semi-Frameless Replacement Cost vs Frameless?

The table below provides a relative cost comparison for shower screen replacement gold coast across the three main screen types. Exact pricing varies by glass area, hardware specification, and site conditions β€” a site measure is always required for an accurate figure.

Screen TypeRelative CostInstall VisitsGlass SpecBest Suited To
Framed$1 visit4–6mm toughenedBudget replacement, rental properties
Semi-Frameless$$1 visit6mm toughenedMost Gold Coast homes β€” best value balance
Frameless (hinged)$$$2 visits10mm toughenedNew builds, full renovations, premium ensuites

Semi-frameless shower screen replacement is the most common choice across the Gold Coast residential market for good reason. It delivers a contemporary, near-frameless aesthetic at a lower price point than fully frameless, installs in a single visit, and tolerates the slightly out-of-plumb walls and non-standard openings that are common in older Gold Coast homes and apartment buildings.

Frameless replacement costs more for three specific reasons: 10mm glass is heavier and more expensive to manufacture and transport than 6mm; the precision hardware required for frameless screens is engineered to tighter tolerances and carries a higher material cost; and the two-visit installation process doubles the on-site time compared to semi-frameless.

Pro Tip: The cost premium for frameless over semi-frameless is most justified in a full bathroom renovation where tiles, tapware, and vanity are all being replaced simultaneously β€” because the additional frameless cost is a small share of total renovation spend, and the visual return is significant. For a straightforward screen replacement where everything else is staying, semi-frameless is almost always the more practical choice.

What Are the Unforeseen Costs That Can Emerge During Replacement?

A shower screen replacement quote generally covers all known costs at the time of quoting. The costs below are unforeseen β€” they only emerge during the job, typically at the point of removal β€” and cannot be included in the original quote because they are not knowable until the old screen comes out.

  • Waterproofing repair β€” the most significant potential unforeseen cost. If the waterproofing membrane beneath the tiles has failed β€” which may not be evident before the old screen is removed β€” it must be repaired and allowed to cure before the new tiles are laid and screen can be installed. The extent of the damage, and therefore the cost, is only known after removal. In Gold Coast bathrooms where the original waterproofing is now 30-50 years old, this is a realistic possibility worth factoring into your planning.
  • Tile replacement β€” tiles that lift during removal of the old screen frame may need to be replaced. If the tiles are in a discontinued range, sourcing matching tiles may require a larger patch area than the damage itself β€” or a complete retile of one wall if an exact match cannot be sourced. This is most common in Gold Coast homes and apartments renovated in the late 1990s.
  • Wall substrate repair β€” waterproofing has failed it likely has damaged theΒ  wall substrate and even the structural timbers β€” the substrate must be repaired, waterproofed and re tiled before the new screen can be installed.Β 
  • Extended removal time for corroded fixings β€” in beachside Gold Coast suburbs where the original hardware was not marine-grade, fixings can corrode to the point where extraction requires significantly more time than a standard removal. This is particularly common in Coolangatta, Mermaid Beach, and Hope Island properties. Heavily corroded fixings may also leave the wall substrate damaged around the plug hole, requiring repair before new fixings can be set.

The honest answer to ‘what will my shower screen replacement cost?’ is: a quote covers what is knowable before the job starts. What is discovered during removal may add to that total. The best way to manage this is to be aware of the risk factors β€” old waterproofing, corroded hardware, tiles bonded to the old frame β€” and factor a contingency into your budget accordingly.

Does the Shower Screen Replacement Cost Include Removal of the Old Screen?

Yes β€” removal of the existing screen is included as part of the shower screen replacement service at Gold Coast Shower Screens. The old screen is removed on installation day, immediately before the new screen is fitted. Disposal of the old glass panels and frame is also included.

This is worth confirming with any provider before accepting a quote. Some suppliers quote the supply and installation of the new screen only, with removal and disposal quoted separately. Ensure you are comparing like-for-like when evaluating quotes β€” a quote that does not include removal will appear lower but will not be lower in total.

Removal happens on installation day β€” not in advance. Removing the old screen in advance leaves the bathroom unusable during the manufacture period and up to the time of installation. Some owners may also choose to remove the old screen themselves.

Pro Tip: When booking a shower screen replacement on the Gold Coast, ask specifically: does the quote include removal and disposal of the old screen? Does it include the measure appointment? And is the price based on standard site conditions, or will there be additions for access constraints. Waterproofing issues, or tile damage discovered during removal will be required to be fixed prior to installation and will usually incur additional costs to the owner. Getting clear answers to these three questions prevents billing surprises.

How Do You Get an Accurate Quote for Shower Screen Replacement on the Gold Coast?

A phone quote for shower screen replacement gold coast is always an estimate. The only accurate quote comes from a site measure β€” and even a site measure cannot account for what is beneath the old screen until it is removed.

Here is the most reliable path to an accurate figure:

  • Use an online estimator for a starting range β€” an instant estimate tool gives you a realistic cost range based on screen type and configuration before committing to a measure appointment. It will not be your final price, but it tells you whether the ballpark matches your budget.
  • Book a free measure β€” a glazier visits, takes precise measurements of the shower opening, and assesses the existing screen’s condition and the site-specific factors that will affect the job. This visit produces a confirmed quote based on the actual bathroom β€” not a generic estimate.
  • Confirm what is included β€” before accepting any quote, confirm that it includes the measure appointment, custom glass manufacture, removal and disposal of the old screen, installation, silicone sealing, door alignment, and compliance certification. A quote missing any of these is not a complete service quote.
  • Factor a contingency for unforeseen costs β€” particularly relevant in older Gold Coast properties. Waterproofing issues, tile damage, and corroded fixings are common enough in homes and apartments from the 1980s and early 1990s that a 10–15% contingency above the quoted price is a sensible planning position.

For properties in Surfers Paradise, Broadbeach, Robina, Ashmore, Nerang, Helensvale, Coomera, Labrador, Runaway Bay, and surrounding suburbs β€” contact Gold Coast Shower Screens for a free measure and quote. For a quick indicative range before the measure, use the Instant Estimate form on the Gold Coast Shower Screens website.

Final Thoughts

Shower screen replacement cost on the Gold Coast is driven by screen type, glass area, hardware specification, and what the removal reveals about the existing installation. Most of those factors are known before the job starts. The one that is not β€” waterproofing condition β€” is the one that catches people off guard most often.

The most practical approach is to get an accurate measure-based quote, confirm exactly what is included, and budget a contingency for the things that cannot be known until the old screen comes down. For most straightforward Gold Coast shower screen replacements, that contingency never needs to be used. But for older properties, and for bathrooms where the existing screen has been leaking, it is the difference between a project that finishes on budget and one that doesn’t.

Gold Coast Shower Screens provides free measure and quote appointments for shower screen replacement across the Gold Coast β€” covering Surfers Paradise, Broadbeach, Burleigh Heads, Robina, Southport, Nerang, Ashmore, Helensvale, Coomera, Parkwood, Molendinar, Labrador, Runaway Bay, Hope Island, and Tweed Heads. Use the Instant Estimate form for a quick price range, or contact us to book a measure.

Sliding Shower Screens Gold Coast Everything You Need to Know

Sliding Shower Screens Gold Coast: Everything You Need to Know

Sliding shower screens on the Gold Coast use a top-hung roller system β€” allowing the door to travel laterally without requiring swing clearance in front of the screen. This makes them the most practical option for compact bathrooms where a hinged door would conflict with a vanity, toilet, or the bathroom door itself. Available in semi-frameless and fully frameless configurations, sliding shower screens gold coast homeowners choose are custom-manufactured to the exact dimensions of the opening β€” delivering a clean, sealed result in spaces that standard hinged configurations cannot accommodate. This guide covers how sliding screens work, which configuration suits which bathroom, what they cost, and what maintenance looks like in the Gold Coast’s coastal climate.

What Is a Sliding Shower Screen and How Does It Differ From a Hinged Door?

A sliding shower screen operates on a top-hung roller system β€” the door panel hangs from a track mounted at the head rail and slides laterally across the opening. In Frameless screens there is no bottom track or floor channel. Water containment at the base relies on the overlap between the sliding panel and the fixed panel, plus the silicone seal at the base of the fixed panel.

The fundamental difference from a hinged door is spatial. A hinged door requires clear floor space equal to the door’s width in the arc it travels β€” typically 600–700mm in front of the screen. A sliding door requires no floor clearance in front of the screen at all. The door travels parallel to the fixed panel rather than swinging outward into the bathroom.

This distinction is why Gold Coast apartments often rely on sliding door screens β€” particularly in high-rise buildings across Surfers Paradise, Broadbeach, Ashmore, Southport, and Labrador where bathroom dimensions are tight and every centimetre of floor space matters.

FactorSliding DoorHinged Door
Floor clearance requiredNone β€” door travels parallel to fixed panel600–700mm swing arc in front of screen
Best forCompact bathrooms, apartments, tight layoutsLarger bathrooms with clear floor space
Bottom trackNo β€” top-hung roller system onlyNo (frameless) or optional (semi-frameless)
Water containmentPanel overlap plus base silicone sealDoor seal engagement on all edges
MaintenanceRoller mechanism requires periodic cleaningHinge adjustment over time
Installation visits1 visit (semi-frameless); typically 1 visit (frameless sliding)1 visit (semi-frameless); 2 visits (frameless hinged)
Relative cost$$ β€” comparable to semi-frameless hinged$$ (semi-frameless) to $$$ (frameless hinged)

One practical note: sliding shower screens are not suited to every opening configuration. A bypass-style sliding screen β€” where the door and fixed panel overlap by 100–150mm β€” requires a minimum opening width to allow the door to travel sufficiently clear for entry. Very narrow openings (under approximately 700mm) may not accommodate a practical sliding configuration. A site measure confirms whether sliding is viable for your specific opening.

Semi-Frameless Sliding vs Frameless Sliding β€” Which Is Right for Your Gold Coast Bathroom?

Both semi-frameless and frameless sliding shower screens use a top-hung roller mechanism, but they differ in glass thickness, hardware weight, aesthetic, and what the bathroom walls need to support them.

Semi-Frameless Sliding Shower Screens

A semi-frameless sliding screen uses 6mm toughened safety glass, a slim aluminium head rail carrying the roller track and a bottom rail, and fixed panels anchored to one wall. The head rail distributes the door’s weight along its full length β€” which means wall backing requirements are less demanding than for frameless configurations. Semi-frameless sliding screens are completed in a single installation visit and are the practical choice for most Gold Coast apartment bathrooms.

The semi-frameless sliding configuration is also the most common shower screen replacement option for older Gold Coast bathrooms β€” particularly those in apartment buildings in Ashmore, Nerang, Labrador, and Southport built in the 1980s and 1990s where sliding screens were the standard installation and the replacement simply needs to match the existing opening dimensions with better hardware and glass.

Frameless Sliding Shower Screens

A frameless sliding shower screen uses 10mm toughened glass and a heavier-duty stainless steel roller mechanism mounted to the fixed panel and wall rather than to an aluminium head rail. Gold Coast Shower Screens also produce a Slotted Glass Fully Frameless Shower Screen where a slot is CNC machined onto the fixed panel to allow a set of rollers to run along it. This produces an absolute fully frameless shower screen. However, the structural demands are greater: wall fixings must be anchored into confirmed solid backing, and the roller mechanism itself requires precise levelling to ensure the door travels smoothly across its full width.

Frameless sliding configurations are most appropriate for new builds and full renovations where wall conditions can be confirmed during construction β€” and where the bathroom opening is large enough to make the frameless aesthetic worthwhile. In a 900mm opening, the visual difference between semi-frameless and frameless sliding is less pronounced than in a 1,200mm or wider opening where the uninterrupted glass surface has more impact.

Pro Tip: If you are replacing an existing sliding screen in a Gold Coast apartment, the simplest and most cost-effective approach is a semi-frameless sliding replacement. 

What Are the Benefits of Sliding Shower Screens in Small Gold Coast Bathrooms?

The space-saving benefit of a sliding shower screen is the reason it exists β€” and in the Gold Coast residential market, that benefit is relevant to a large proportion of the building stock. High-rise apartments across Surfers Paradise, Broadbeach, Robina, and Helensvale commonly have ensuite bathrooms where the distance between the shower base and the vanity, toilet, or bathroom door is less than 800mm. A hinged door in that space is a daily inconvenience. A sliding door eliminates the problem entirely.

Beyond the obvious spatial benefit, sliding shower screens offer several practical advantages in compact bathroom layouts:

  • No door swing into wet areas β€” a hinged door that swings outward can deposit water on the bathroom floor beyond the shower zone. A sliding door stays within the screen’s footprint β€” all water travel from the opening panel stays above the shower base.
  • Easier access for mobility considerations β€” a sliding door creates a wider accessible opening than a hinged door of the same panel width, because there is no hinge side restricting the entry point. This is particularly relevant in Gold Coast retirement and accessible housing, where shower access width is a functional requirement.
  • No clearance conflict with bathroom fixtures β€” in bathrooms where the toilet is directly beside the shower base, or where the vanity door swings across the shower entry zone, a hinged shower door creates a permanent conflict. A sliding door removes that conflict without any modification to the existing bathroom layout.
  • Cleaner visual profile in a small space β€” a sliding screen with a minimal aluminium head rail and 6mm glass has a lighter visual presence in a compact bathroom than a hinged screen with hinge bodies, handles, and a door sweep all taking up visual space. In small bathrooms, reducing visual clutter makes the space feel larger.

For shower screen ideas for small bathrooms that go beyond the sliding configuration β€” including walk-in panels and semi-frameless alternatives suited to compact layouts β€” see our guide to the best shower screens for small Gold Coast bathrooms.

How Much Do Sliding Shower Screens Cost on the Gold Coast?

Sliding shower screens gold coast pricing follows a similar structure to hinged configurations β€” glass area, screen type, hardware finish, and site conditions are the primary variables. The sliding mechanism itself adds a modest cost over a standard hinged semi-frameless configuration, offset in most cases by the single-visit installation that both semi-frameless sliding and frameless sliding typically require.

ConfigurationRelative CostInstall VisitsKey Cost Driver
Semi-Frameless Sliding$$1 visitGlass area, hardware finish, roller mechanism
Frameless Sliding (wall-fixed track)$$$1 visit10mm+ glass, heavy-duty roller, structural wall assessment
Frameless Sliding (ceiling-hung)$$$$1–2 visitsCeiling structural confirmation, bespoke track fabrication

For most Gold Coast shower screen replacements involving a sliding configuration, the semi-frameless sliding option delivers the best value outcome β€” contemporary hardware, custom glass, single-visit installation, and a price point that is comparable to a standard semi-frameless hinged replacement.

Frameless sliding configurations are premium products suited to specific installation contexts β€” high-specification new builds and full renovations where the bathroom design and wall conditions are engineered to support them. For a detailed cost breakdown of shower screen replacement on the Gold Coast across all screen types, see our guide to shower screen replacement costs.

What Maintenance Do Sliding Shower Screens Require in a Coastal Climate?

Sliding shower screens gold coast homeowners ask about most in terms of maintenance is the roller mechanism β€” and rightfully so. The top-hung roller system is the functional core of a sliding screen, and in the Gold Coast’s coastal climate, it faces sustained humidity, salt air in beachside suburbs, and daily water exposure.

Roller Track Cleaning

The roller track mounted at the head rail accumulates soap residue, hard water mineral deposits, and in coastal suburbs, salt crystallisation over time. A track that is not periodically cleaned develops increased rolling resistance β€” the door begins to drag, skip, or require force to travel smoothly. Clean the track with a damp cloth and a mild detergent monthly. A soft brush removes build-up from inside the track channel without scratching the aluminium surface. Avoid abrasive cleaners β€” they scratch the track profile and create surface roughness that accelerates roller wear.

Roller Wheel Inspection

The roller wheels that travel along the track are nylon or stainless-steel components β€” both degrade over time with continuous use and exposure to cleaning chemicals. Inspect the rollers every twelve to twenty four months by lifting the door slightly and observing whether the wheels spin freely and evenly. A wheel that is cracked, flat-spotted, or has seized bearings creates a characteristic juddering or uneven movement when the door is slid. Roller replacement on a semi-frameless sliding screen is a straightforward repair β€” roller kits for most standard track profiles are available, and replacement does not require removing the glass panel.

Avoid WD-40 or petroleum-based lubricants on sliding shower screen roller tracks. These products attract dust and soap residue, which accumulates in the track and accelerates wear on the roller wheels. For roller lubrication, use a dry PTFE spray or a silicone-based lubricant specifically rated for bathroom hardware.

How Do You Find a Sliding Shower Screen Specialist on the Gold Coast?

Not all glaziers who supply shower screens have experience with sliding configurations. The roller mechanism, the track levelling process, and the overlap adjustment for a correctly sealed sliding door require hands-on experience β€” and the quality difference between an experienced sliding screen installer and a generalist is visible in day-to-day operation from the first use.

When evaluating sliding shower screen suppliers on the Gold Coast, look for:

  • Custom manufacture β€” sliding shower screens must be manufactured to the exact finished dimensions of your opening. Standard catalogue sizes rarely accommodate the non-standard wall conditions common in Gold Coast homes and apartments. A supplier who offers standard-size sliding screens is not offering a like-for-like alternative to a custom screen β€” the fit and seal quality will reflect that.
  • QBCC licensing β€” Queensland requires a QBCC licence for structural glazing work, including shower screen installation. Ask for the licence number before committing. It is publicly verifiable on the QBCC licence check website, and any installer who is reluctant to provide it should be reconsidered.
  • Experience with sliding configurations specifically β€” ask directly: how many sliding shower screens do they install per month. An experienced installer can answer this questions without hesitation.
  • Workmanship warranty β€” a workmanship warranty that covers the installation as well as the product. If the roller mechanism develops a fault, the track is not level, or the door seal fails to engage correctly within the warranty period, it should be rectified at no cost. Ask for the warranty terms in writing before accepting a quote.

Gold Coast Shower Screens installs sliding shower screens gold coast wide β€” including semi-frameless and frameless sliding configurations for apartments and homes across Surfers Paradise, Broadbeach, Burleigh Heads, Robina, Southport, Nerang, Ashmore, Helensvale, Coomera, Labrador, Runaway Bay, and Tweed Heads.

Final Thoughts

Sliding shower screens are the right choice for a specific set of bathroom conditions β€” and for those conditions, they are not just a practical workaround but the best-performing option available. If your bathroom cannot accommodate a hinged door without clearance conflicts, a correctly specified and installed sliding screen delivers the same custom fit, the same compliance certification, and the same long-term performance as any other screen type.

The two decisions that matter most are configuration β€” semi-frameless or frameless β€” and hardware specification. Get those right at the start, with a glazier who can demonstrate experience with sliding installations specifically, and the result will be a screen that performs as well on day one thousand as it does on day one.

Gold Coast Shower Screens supplies and installs custom sliding shower screens across the Gold Coast β€” semi-frameless and frameless configurations, for apartments and houses, in all standard and non-standard opening dimensions. Contact us for a free measure and quote, or use the Instant Estimate form for a quick price indication before booking.

How to Safely Remove a Frameless Glass Shower Panel

How to Safely Remove a Frameless Glass Shower Panel

Removing a frameless glass shower panel safely requires suction cups, a second person, and releasing hinges in the correct sequence β€” door first, then fixed panels. Because frameless panels use 10mm toughened glass weighing 30–50kg, they cannot be handled alone or rested on a hard surface without risk of fracturing. Getting the hinge release sequence wrong, or trying to manage the weight without suction cups, is how panels drop β€” and a dropped 10mm glass panel will shatter across every surface in the bathroom. This guide covers exactly how to remove a frameless glass shower panel correctly, what tools are non-negotiable, and when the job warrants calling a professional glazier instead.

What Makes a Frameless Panel Different to Remove?

Most shower screen removal jobs are straightforward β€” cut the silicone, unscrew the fixings, lift the glass clear. Frameless screens are different in three specific ways that make each of those steps more demanding.

First, the weight. A frameless door panel in a standard 900mm opening uses 10mm toughened glass weighing approximately 30–35kg. At 1,200mm, that rises to 45–50kg. This is not glass you steady with one hand while loosening a hinge with the other. It requires suction cups on the panel and a second person in position before any fixing is touched.

Second, the structural load. In a framed or semi-frameless screen, the aluminium frame carries much of the glass’s weight and holds it stable during removal. In a frameless screen, the hinge bodies and clamps are the only connection between the glass and the wall. When those fixings are loosened, the panel has nothing supporting it except the person holding it.

Third, the sequence. Frameless screens are installed in a specific order β€” fixed panels first, door last β€” and must be removed in the reverse order. Attempting to remove a fixed panel before the door is clear creates a situation where both pieces of glass are unsupported simultaneously. That is when panels contact each other, chip, or fall.

Understanding these three differences before you start is what separates a clean removal from an expensive one.

What Tools Do You Need Before You Start?

Every tool listed below earns its place. Substituting or skipping any of them increases the risk of glass breakage, tile damage, or injury.

  • Suction cups (minimum two, rated for glass) β€” the most critical tool for frameless glass shower panel removal. A pair of quality suction cups rated to at least 80kg each gives you control over the panel as hinges are released. Without them, you are holding 40–50kg of glass by its edge β€” which is neither safe nor stable.
  • Stanley knife or silicone removal tool β€” all silicone at glass-to-wall and glass-to-floor junctions must be cut before any fixing is loosened. A sharp blade run along the tile face cuts the silicone bond cleanly. A dull or rounded blade drags, applies excess pressure, and risks scoring the tile.
  • Allen key or hex driver set β€” frameless hinges are typically fixed with hex-head screws. Check the hinge type before the job and confirm you have the correct key size. Rounding a hex head on a structural hinge screw is a significant complication.
  • Drop sheets, carpet scraps and thick cardboard β€” laid over the shower base, floor tiles, and any surrounding surfaces before work begins. If a panel drops or contacts a hard surface, cardboard absorbs the impact and contains the fragments. Toughened glass fragments are small but spread instantly.
  • Safety glasses and heavy work gloves β€” toughened glass does not produce large shards, but glass dust and small chips are an eye and skin hazard during any removal. Glasses and gloves are non-negotiable.
  • Second person β€” not optional for frameless glass. One person manages the suction cups and controls the panel weight. The other releases fixings and guides the panel clear. This job cannot be done safely alone.

Pro Tip: Before touching any fixings, photograph the full screen from multiple angles β€” hinge positions, clamp placements, silicone lines, and fixing locations. If you are having a new screen installed, these photographs help the glazier understand the existing configuration and identify any complication before the measure appointment.

How Do You Remove a Frameless Glass Shower Panel β€” Step by Step?

The sequence below applies to a standard hinged-door frameless configuration β€” the most common type installed in Gold Coast homes and apartments across Surfers Paradise, Broadbeach, Robina, and Helensvale. Variations for pivot-clamp and fixed-panel-only configurations are noted where relevant.

Step 1: Lay drop sheets and cardboard β€” cover the shower base, floor tiles, and any tiles adjacent to the screen. Do not skip this step to save time. It takes two minutes and eliminates the most common source of collateral damage during frameless glass panel removal.

Step 2: Cut all silicone β€” run a sharp Stanley knife or silicone removal tool along every silicone joint: glass-to-wall at the hinge side, glass-to-floor at the base, and the door seal perimeter where it meets the fixed panel edge. Every millimetre of silicone must be cut before any fixing is loosened. A panel that is still partially bonded by silicone will resist movement and concentrate stress at the fixed point β€” which is where glass fractures.

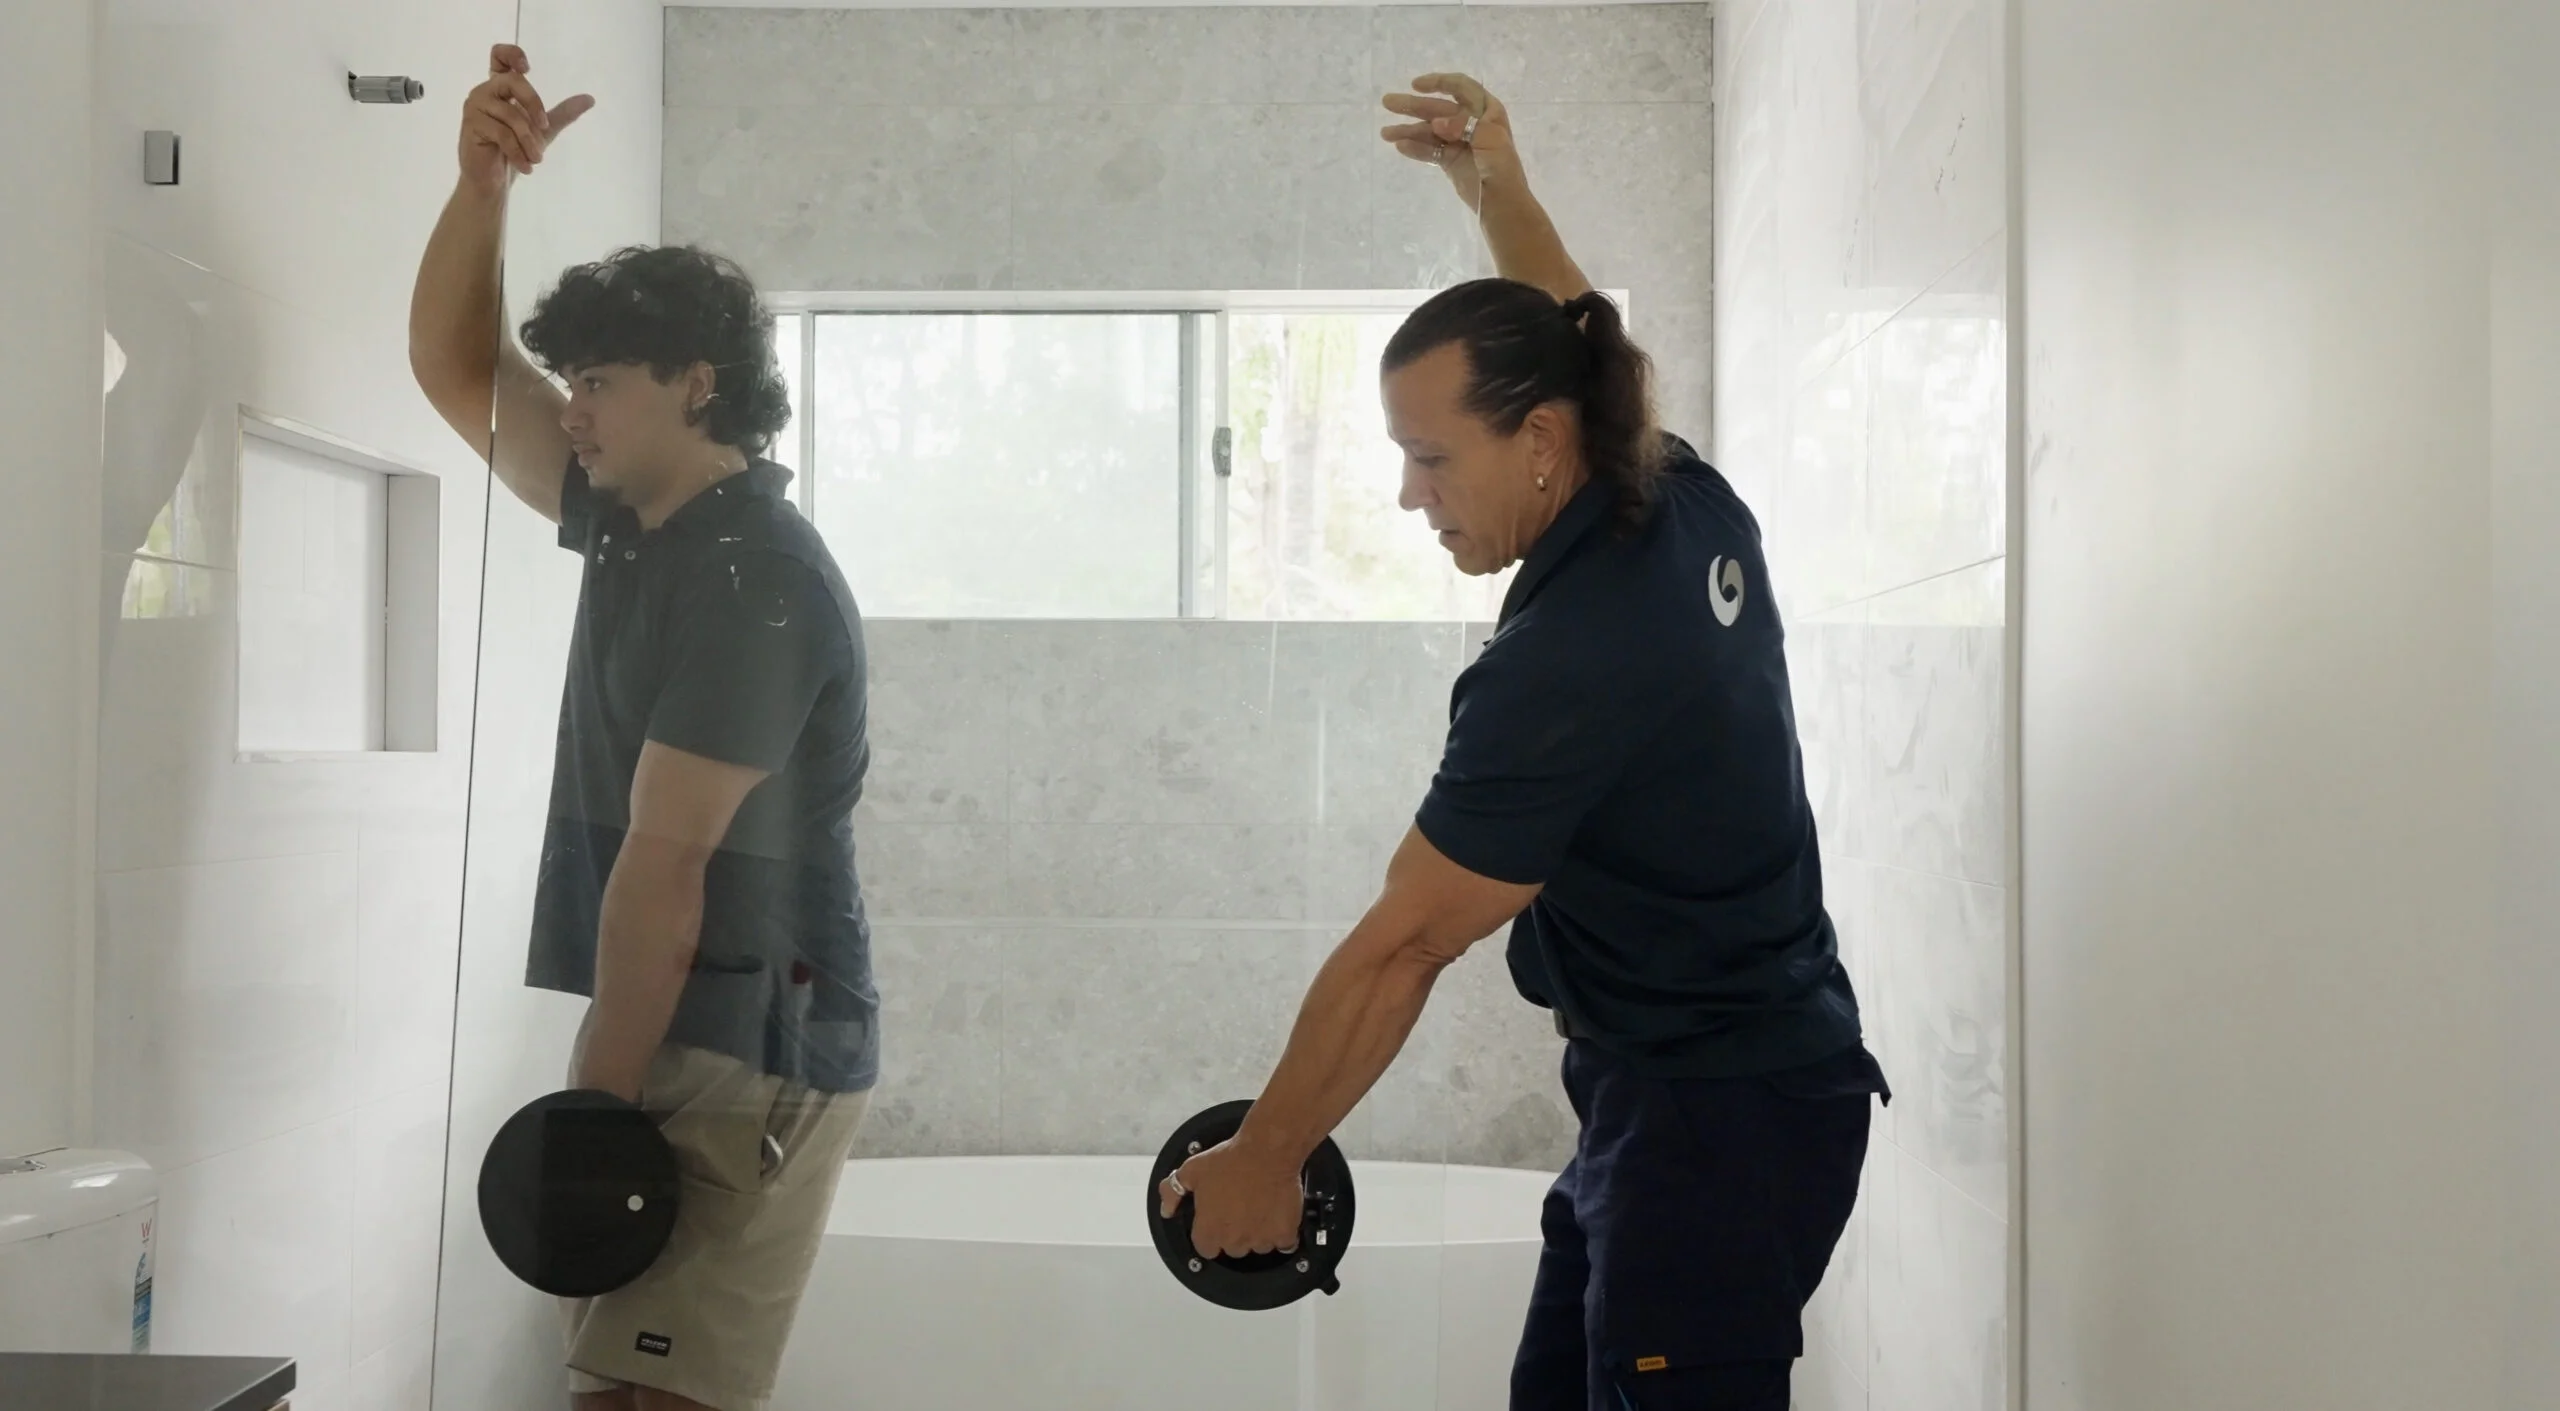
Step 3: Attach suction cups to the door panel β€” position one suction cup in the upper third of the door panel and one in the lower third. Confirm both are engaged and holding before proceeding. Your second person takes the suction cups and holds the panel steady.

Step 4: Loosen (do not remove) the hinge body screws β€” using the correct Allen key, loosen the screws securing the hinge body to the wall by two to three turns. Do not remove them fully yet. Loosening allows the hinge to release its grip on the glass without the panel suddenly becoming free. Your second person maintains firm pressure on the suction cups throughout this step.

Step 5: Slide the door panel off the hinge β€” most frameless hinges in Australia use a “C” cutout in the glass. β€” the door panel slides straight out of the hinge when the screws are loosened. With suction cups engaged and both people in position, slide the door panel away and clear of the hinges. Move it laterally away from the opening and stand it onto the cardboard or carpet scrap.

Step 6: Remove the fixed panels β€” with the door clear, attach suction cups to the fixed panel or panels. Loosen the wall clamps and standoffs using the appropriate driver. Support the panel weight throughout. Lower each fixed panel flat onto the cardboard, separated from the door panel. Do not stack panels.

Step 7: Remove hinge bodies and clamps from the wall β€” with all glass clear, remove the remaining wall fixings.

How Do You Handle the Weight of a 10mm Glass Panel Safely?

The weight of frameless glass is where most DIY removals go wrong. Here is what 10mm toughened glass actually weighs, and what that means practically:

Panel WidthPanel HeightGlass ThicknessApproximate Weight
900mm2,000mm10mm~45kg
1,000mm2,000mm10mm~50kg
1,200mm2,100mm10mm~60kg
Door panel (standard)2,000mm10mm30–45kg typical

Suction cups rated to at least 80kg per cup are the minimum. Quality glazing suction cups have a visible pressure gauge or indicator β€” do not use household or general-purpose suction cups for frameless glass. They are not rated for this load.

When moving a panel clear of the opening, travel distance should be minimised. The further the glass travels from its original position, the more opportunity for contact with walls, doors, vanities, or other fixtures. Clear the path before lifting. Lower the panel flat as soon as it is clear of the opening β€” every second it is being carried upright is a second it can pivot unexpectedly.

What Are the Most Common Mistakes When Removing Frameless Glass?

These are the errors that turn a manageable job into a repair bill:

  • Attempting it alone β€” frameless glass panel removal is a two-person minimum job. There is no safe workaround. A single person cannot simultaneously manage a 40–50kg glass panel on suction cups and release hinge fixings. If you do not have a second person available, stop and book a professional.
  • Cutting silicone incompletely β€” one of the most common causes of glass fracture during removal. A panel that is still bonded by even a short section of silicone will resist movement, and the resulting stress concentrates at the bonded point. Run your knife along every millimetre of every silicone joint before touching any fixing.
  • Storing panels on their edge β€” a panel resting against a wall will slide. Always store flat on cardboard.
  • Using undersized suction cups β€” household suction cups are not rated for 10mm glass weights. Use glazing-grade suction cups rated to at least 80kg per cup.

When Should You Call a Professional Instead of Removing It Yourself?

DIY removal of a frameless glass shower panel is achievable when conditions are straightforward β€” a standard hinged configuration, correct tools, two people, and no signs of prior water damage. Outside those conditions, the risk-to-reward ratio shifts quickly.

Call a professional glazier for frameless panel removal if:

  • You cannot source a second person β€” this is not a job that can be adapted for solo work. The weight and handling requirements of 10mm glass make a second person a fixed requirement, not a preference.
  • The screen is in a Gold Coast apartment building β€” high-rise buildings in Surfers Paradise, Broadbeach, Robina, and Southport add complications: lift access for glass disposal, building management coordination, and corridor constraints that make panel manoeuvring significantly more complex. A professional team manages this as routine.
  • The hinges are corroded or seized β€” frameless hinges in beachside suburbs β€” Mermaid Beach, Coolangatta, Hope Island β€” can corrode to the point where releasing them requires force that destabilises the panel. A corroded hinge screw that shears during removal leaves the panel partially fixed and uncontrolled. Professional assessment before forcing anything is the right call.

Final Thoughts

Removing a frameless glass shower panel is not the most complex job in a bathroom renovation β€” but it is one of the least forgiving. The weight of 10mm toughened glass, the precision required in the hinge release sequence, and the consequences of a panel drop mean that cutting corners on tools, preparation, or personnel is never worth it.

Get the tools right, get a second person, cut every millimetre of silicone before touching a fixing, and store the panel flat the moment it clears the opening. Follow that sequence and the job is manageable. Skip any part of it and the job becomes significantly more expensive.

Gold Coast Shower Screens handles frameless screen removal and replacement across the Gold Coast β€” including high-rise apartments and coastal properties where standard removal approaches don’t apply. Contact us for a free assessment if you are unsure about your screen’s condition or configuration before removal begins.

How to Remove a Semi-Frameless Shower Screen Expert Tips & DIY Steps

How to Remove a Semi-Frameless Shower Screen: Expert Tips & DIY Steps

Removing a semi-frameless shower screen involves cutting all silicone at wall, base, and frame junctions before any glass is moved β€” door first, then fixed panel, then head rail and side jamb. Unlike fully framed screens, semi-frameless configurations have a perimeter frame which is usually siliconed around the frame on the outside of the shower. The silicone must be cut cleanly without scoring the tile surface. Rushing this step is the most common cause of tile damage and waterproofing breach during semi-frameless shower screen removal on the Gold Coast. This guide covers the full removal sequence, the correct silicone technique, waterproofing protection, and what to check before ordering a replacement.

What Is a Semi-Frameless Shower Screen and Why Does It Remove Differently?

A semi-frameless shower screen uses a slim aluminium channel at the head rail and one side jambs and bottom rail. The glass panels are 6mm toughened glass, lighter than the 10mm used in frameless screens, In a semi-frameless screen, the silicone is the primary seal β€” which is why cutting it correctly, without scoring the tile underneath, is the technical core of the whole removal job.

The other key difference is the removal sequence. Semi-frameless screens must be removed in this order: door, fixed panel or panels, then side jamb channel. Reversing any part of this sequence creates situations where unsupported glass must be managed while fixings are still being released β€” which is where panels contact each other and chip.

What Tools Do You Need to Remove a Semi-Frameless Shower Screen?

The right tools make the silicone-cutting step β€” the most important step in the process β€” significantly easier and safer for your tiles.

  • Silicone removal tool or new Stanley knife blade β€” a silicone removal tool has a hooked blade specifically designed to run along a tile face without cutting into the grout or tile surface. A fresh Stanley knife blade works in the same way. Never use a blade that has been used for other cutting β€” it drags rather than slices and requires more pressure than tiles can safely absorb.
  • Flat pry bar (small) β€” for releasing the head rail and side jamb channel after the glass is clear. The flat profile distributes leverage across the length of the channel rather than concentrating it at a single point that can crack tiles or pull fixings through the wall substrate.
  • Suction cups β€” for handling the fixed glass panel once it is free. The door can usually be managed by hand β€” it is hinged, lighter than the fixed panel in most configurations, and has a handle. The fixed panel has neither. A pair of suction cups gives you control without relying on grip at the edges.
  • Drop sheets and thick cardboard β€” laid over the shower base and floor tiles before any work begins. Glass fragments from toughened glass are small but spread instantly. Cardboard also protects tiles from the metal edges of the head rail and side jamb as they are removed.
  • Safety glasses and heavy work gloves β€” glass dust and small chips are an eye and skin hazard during any glass removal. Non-negotiable.

Pro Tip: Run your finger along the full length of every silicone joint before you start cutting. This tells you where the silicone is thick (bonded well), where it is thin or already cracking (easier to cut), and where it has mould suggesting the seal may have already failed. Failed silicone near the base should be flagged β€” it may mean water has already reached the waterproofing membrane beneath the tiles.

How Do You Cut the Silicone Without Cracking Tiles?

This is the step that determines the outcome of the entire removal. Done correctly, the glass and frame lift away cleanly. Done incorrectly, tiles crack, grout lines lift, and what should have been a straightforward shower screen removal turns into a tiling job first.

The Correct Technique

Hold the blade at a low angle β€” almost flat against the tile surface, not perpendicular to it. Insert the tip of the blade at one end of the silicone bead and draw it along the length of the joint in a single continuous pass. The goal is to separate the silicone from the tile face without cutting into the tile or the grout. Do not saw back and forth. Do not apply downward pressure into the tile β€” the cutting force should be along the direction of travel, not into the surface.

Run the blade along both faces of every silicone bead β€” the face bonded to the tile or wall, and the face bonded to the glass or frame. A silicone bead that is only cut on one face is still partially bonded and will resist when you apply removal force to the frame or glass.

Joints to Cut β€” in Order

Cut in this sequence to minimise the risk of applying force to a panel that is still partially bonded:

  • Base silicone (glass-to-floor junction) β€” the longest and most critical joint. This is where the waterproofing seal sits. Cut both the frame face and the tile face of this bead in full before moving to anything else.
  • Wall silicone at the hinge side β€” the joint running vertically where the door or fixed panel meets the wall on the hinge side. Cut top to bottom in a single pass.
  • Side jamb silicone β€” the vertical joint where the side jamb meets the wall on the fixed panel side. Cut top to bottom.

Important: Do not apply any removal force to the door, fixed panel, or frame channels until every silicone joint is fully cut. A frame still bonded at one point will transfer the full removal force to that single bonded area β€” which is where tiles lever off the wall. If resistance is felt when trying to move any component, stop, find the remaining bond, and cut it before continuing.

How Do You Remove the Door, Fixed Panel, and Head Rail in the Right Order?

With all silicone cut, the removal sequence follows the same logic as the installation sequence β€” in reverse.

Step 1: Remove the door β€” open the door to 90 degrees and lift it clear of the hinge pins. Most semi-frameless doors use lift-off hinges β€” the door lifts straight up and releases from the fixed hinge body. If the door does not lift free easily, check that the hinge retaining screws are fully loosened first. Set the door flat on the cardboard outside the shower base.

Step 2: Remove the fixed panel/s β€” Most semi frameless or framed showers have vertical channels secured to the wall in which the semi frameless frame slides into. There will be screws or rivets holding these vertical sections in place on the inside of the shower, these need to be removed. Now cut all the silicone securing the screen to the tiles this is usually on the outside of the shower but may be on both sides. When the silicon is removed ease the panels away from the wall. Lower the panel steadily onto the cardboard.

One person can manage the semi-frameless removal sequence in most cases β€” the door is light enough to handle solo, and the fixed panel with suction cups is manageable in a standard bathroom space. In compact Gold Coast apartment bathrooms across Ashmore, Labrador, Southport, and Nerang where the shower opening is immediately adjacent to a vanity or toilet, a second person is useful for manoeuvring the fixed panel clear without contacting surrounding fixtures.

How Do You Protect the Waterproofing Membrane During Removal?

The waterproofing membrane sits beneath the tile adhesive bed β€” roughly 10–20mm inside the wall and floor surface at fixing locations. It is not visible during removal, but its integrity determines whether the new screen can be installed directly or whether waterproofing remediation is required first.

Where the Risk Is Concentrated

The highest risk to the waterproofing membrane during semi-frameless shower screen removal comes from three locations:

  • Unstable Tiles β€” if you notice tile cracking, loose tiles or movement of any tile during screen removal there is most likely an underlying issue with your waterproofing. You should contact a professional tiler or repair company to rectify the issue before installation of a new shower screen.
  • Penetrating holes β€” shower screens should never have mechanical fixings through the floor. If you have mechanical fixings drilled through your floor then your waterproofing membrane is likely damaged and needs to be repaired prior to installation of your new screen.

After all components are removed and silicone residue is cleared from the tile surfaces, inspect the base of the wall and the floor junction carefully. Look for tiles that flex or sound hollow when tapped (indicating membrane failure beneath the adhesive bed), dark staining in grout lines that was previously hidden by the silicone bead, or tile edges that have lifted slightly from the substrate. Any of these signs warrants a professional waterproofing assessment before a new screen is installed.

Pro Tip: Clear all old silicone residue from tile surfaces before assessing the waterproofing condition. Residual silicone masks the tile surface and makes it impossible to see whether grout lines are compromised or whether there is staining indicating prior water ingress. Use a dedicated silicone remover product and a plastic scraper β€” metal scrapers on older tiles risk surface damage.

What Should You Check Before Installing a Replacement?

The post-removal checklist is the foundation for a successful installation. Everything about the new screen β€” dimensions, fixing positions, waterproofing compatibility β€” depends on an accurate assessment of what the removal has revealed.

  • Remove all silicone residue β€” silicone does not bond reliably to cured silicone. New silicone applied over residue will lift within months. Use a dedicated silicone remover and allow the tile surface to dry fully before the measure appointment.
  • Inspect the waterproofing β€” look for the signs described above. If anything looks compromised, stop and get a professional assessment. Installing a new screen over failed waterproofing seals the problem behind fresh silicone β€” where it continues to cause damage until cabinetry swells or tiles begin to lift.
  • Check wall plumb β€” use a spirit level on both wall faces within the shower opening. A wall that is 5mm out of plumb across the height of the opening requires glass cut to a parallelogram, not a rectangle. This is one of the key measurements a glazier takes at the measure appointment and cannot be guessed from a photograph.
  • Check floor fall β€” the shower floor is designed to drain toward the waste, so it is not flat. The floor fall direction and gradient affect door clearance at the base, the position of the bottom silicone seal, and whether a threshold is required at the shower entry. Confirm this is measured accurately before the new screen is designed.
  • Book the measure appointment β€” a measure for a new semi-frameless shower screen should be taken only after silicone residue is fully cleared, the opening is in its final condition, and any waterproofing issues have been addressed. A measure taken over residual silicone or before repairs are complete produces inaccurate glass dimensions.

For the full supply, measure, and install process β€” including what happens between measure and installation day for a semi-frameless screen β€” see our guide to shower screen manufacturers and installation on the Gold Coast.

If you are replacing a frameless screen rather than a semi-frameless one, the removal process is significantly more demanding due to the weight of 10mm glass. See our separate guide to removing a frameless glass shower panel without breaking it.

Final Thoughts

Removing a semi-frameless shower screen is a manageable job when the silicone is cut correctly and the removal sequence is followed in order. The base silicone line is the step that defines the outcome β€” cut it cleanly, at the right angle, across every millimetre of its length, and the rest follows logically. Rush it or skip a section, and tiles lever off or frames strip through the bond rather than releasing cleanly.

The post-removal inspection is equally important. What the removal reveals about the waterproofing condition beneath the old screen determines everything about what the new screen will require. A few extra minutes of assessment after the old screen is off is significantly cheaper than discovering a waterproofing problem after the new one has been installed and siliconed in.

Gold Coast Shower Screens carries out semi-frameless shower screen removal and replacement across the Gold Coast β€” including assessment of waterproofing condition during removal and full compliance certification for the new installation. Contact us for a free quote across Surfers Paradise, Broadbeach, Burleigh Heads, Robina, Southport, Helensvale, Ashmore, Nerang, and surrounding areas.

How to Replace a Shower Screen on the Gold Coast

How to Replace a Shower Screen on the Gold Coast

Shower screen installation and replacement on the Gold Coast follows a five-stage process: measure after tiling is complete, custom glass manufacture, removal of the old screen on installation day, professional fitting by a QBCC-licensed glazier, and compliance certification under AS 1288:2021. The measure always comes before manufacture β€” and the old screen is removed on installation day, not before. Understanding this sequence helps you plan correctly, avoid the most common scheduling mistakes, and know exactly what to expect from the first phone call through to the first use of your new screen.

What Does Shower Screen Installation on the Gold Coast Actually Involve?

Shower screen installation Gold Coast homeowners book is not a single-day event from start to finish. It spans two separate visits β€” a measure appointment and an installation day β€” with custom glass manufacture happening in between. The full process from initial enquiry to a useable new screen typically takes 7–14 days depending on screen type.

Here is what each stage involves and why it exists in the sequence it does:

1.  Measure β€” a glazier visits your bathroom and takes precise measurements of the shower opening: width at three heights (top, middle, base), wall plumb on both sides, floor fall gradient, and the exact position of any obstacles β€” mixers, niches, towel rails β€” within 300mm of the screen perimeter. This visit produces the confirmed dimensions to which the glass is manufactured. It cannot be replaced by photos or customer-supplied measurements. In the case where new tiling is required this step must take place after the tiling is complete.

2.  Custom glass manufacture β€” the glass is cut, edged, and processed to the confirmed dimensions in the workshop. Semi-frameless screens use 6mm toughened safety glass. Frameless screens use 10mm. All glass must comply with AS/NZS 2208 (Safety Glazing Materials). Manufacture typically takes 5–10 business days depending on screen type and workload.

3.  Removal of the old screen (if required – installation day) β€” the existing screen comes out on the same day as the new one goes in β€” not before. The old screen is removed first, the opening is cleaned, inspected for waterproofing condition and tile damage, and any issues that become visible at this stage are assessed before the new screen is installed.

4.  Installation β€” wall fixings are drilled and anchored. Panels are hung, set plumb, and the door is adjusted for smooth, consistent operation. Semi-frameless screens are completed in a single visit. Frameless hinged-door screens require a second visit β€” fixed panels are installed first, the exact door gap is measured with everything in place, and the door is manufactured to that confirmed dimension before being fitted at the second visit.

5.  Compliance certification β€” a Form 15 (design compliance) and Form 16 (construction compliance) certificate is issued by the QBCC-licensed supervising glazier, confirming the installation meets AS 1288:2021 (Glass in Buildings) and AS/NZS 2208. These certificates are your legal record of a compliant installation and are required for building inspections, property settlements, and insurance claims.

The silicone applied at all wall junctions and the base must cure for a minimum of 24 hours before the shower is used. Plan bathroom access accordingly β€” particularly relevant in single-bathroom homes and apartments.

What Is the Correct Order β€” Measure, Manufacture, or Remove First?

This is the most commonly misunderstood part of shower screen installation on the Gold Coast β€” and getting the order wrong creates problems that cannot be fixed without additional cost.

The correct order is:

StepActionWhy This Order Matters
1Measure (after tiling is complete)Glass is cut to the actual finished opening β€” not an estimate
2ManufactureCustom glass produced to confirmed dimensions
3Remove old screen (installation day)Waterproofing condition only visible once old screen is off the wall
4Install new screenNew screen fits because it was made to the finished opening
5Compliance certificationLegal record of compliant installation issued at completion

Why the Measure Must Come After Tiling

A measurement taken before tiles are laid produces an approximate opening size β€” not the actual finished size. A standard 10mm tile on each side of an 860mm rough opening produces a finished opening of between 830mm to 840mm. The difference matters: glass cut to the rough opening dimension will not seal correctly against the tiled surface, and the gap cannot be corrected on site without remanufacturing the panel.

Grouting and wet area sealant must also be fully complete before the measure appointment.


Why the Old Screen Comes Out on Installation Day

Removing the old screen before the new one is manufactured β€” in advance of the installation appointment β€” seems logical but creates two problems. First, the bathroom is unusable during the manufacture lead time. Second, it adds cost to the job by requiring an additional site visit. If you do not require the shower or plan on removing the screen yourself this is not an issue.

How Long Does Shower Screen Installation Take on the Gold Coast?

Timelines vary by screen type. The table below reflects typical Gold Coast lead times under normal workload conditions.

Screen TypeManufacture Lead TimeInstall VisitsOn-Site DurationTotal Elapsed Time
Semi-Frameless7–10 business days1 visit2–4 hours7–10 days
Frameless (hinged door)7–14 business days2 visitsVisit 1: ~2 hrs / Visit 2: ~3 hrs12–16 days
Framed7-10 business days1 visit2–3 hours6–9 days

These timelines run from the confirmed measure appointment β€” not from the initial enquiry. Allow an additional 1–3 business days for the measure appointment to be booked and completed before manufacture begins.

For frameless hinged-door screens, the second installation visit is not a correction β€” it is a deliberate and required part of the process. The door panel is manufactured to the exact gap confirmed after fixed panels are installed. This is why frameless installation cannot be completed in a single visit and why any installer who offers to do so is cutting a corner that may well produce a misaligned door.

What Do You Need to Prepare Before the Installer Arrives?

Most delays on the Gold Coast come from the bathroom not being ready β€” either tiling is incomplete, the shower base has not cured, or access to the bathroom is restricted. These are all avoidable with a few straightforward checks before booking the measure appointment.

Tiling Must Be Fully Complete

This means tiles laid, grouted, and wet area sealant applied at the floor-to-wall junction. Any work outstanding at the time of the measure β€” means the measurement cannot be taken accurately and the appointment must be rescheduled. In renovation projects where tiling is being done by a separate trade, coordinate directly with your tiler on completion date before booking the glazier’s measure appointment.

Bathroom Access Must Be Clear

The glazier needs unobstructed access to all four walls of the shower recess, the full swing path of the intended door, and the floor area adjacent to the shower base. Remove personal items, towels, and floor mats before the installer arrives. Apartment buildings across Surfers Paradise, Broadbeach, Robina, and Southport with restricted lift access or narrow corridors, will be assessed by our team at time of site measure.

Door Swing Path Must Be Confirmed

Before the measure appointment, confirm that the intended door swing direction does not conflict with the vanity, toilet, heated towel rail, or the bathroom door itself. Shower doors in Australia must swing outward or be dual-action β€” inward-only doors do not comply with the National Construction Code. If the swing path is tight or conflicts with a fixture, discuss sliding or walk-in configurations at the measure appointment.

Existing Screen Removal Is Handled on Installation Day

If you have an existing screen that needs to come out, do not remove it before the installation appointment. The glazier’s team handles removal as the first task on installation day. Removing it yourself in advance leaves the bathroom unusable during the manufacture period.

Pro Tip: If you are renovating an existing bathroom and having the screen replaced as part of a larger project, sequence the installation appointment after all other wet area work is complete β€” tiling, tapware, and vanity installation included. Shower screen installation should be one of the final trades on site, not one of the first.

What Can Delay a Shower Screen Installation on the Gold Coast?

Understanding the most common delay causes helps you avoid them β€” and helps you manage expectations when they occur despite best preparation.

  • Tiling not complete at measure time β€” the most common delay by a significant margin across Gold Coast installations. Grouting is particularly often overlooked. Book the measure appointment only when every tiling task β€” including grout and wet area sealant β€” is fully finished.
  • Waterproofing or tile repairs required after removal β€” despite prior inspection it is often not possible to determine how well old tiles are adhered to the wall and floor surface. Discovered on installation day when the old screen comes off the wall, it is a sign that the waterproofing has failed and the substrate is damaged causing the tiles to lift. If the shower has been leaking, or if the original waterproofing is now 15–20 years old (common in Gold Coast homes and apartments built in the late 1990s and 2000s), the membrane may have failed. Waterproofing repairs require a licensed waterproofer and a minimum cure period before the new screen can be installed. This delay cannot be predicted in advance β€” it is discovered at removal.
  • High-rise access logistics in Gold Coast towers β€” apartment buildings in Surfers Paradise, Broadbeach, Helensvale, and Coomera may require advance booking of service lifts, strata notification, and coordinated glass delivery. If these logistics are not arranged before installation day, the appointment must be rescheduled. Advise the installation team of any building access requirements at the time of booking, not on the day.
  • Tiles not continuing behind the old screen frame β€” older Gold Coast homes and apartments where the original shower screen frame was installed before tiling sometimes have tiles that were laid up to the frame rather than behind it. When the frame is removed, the tile line ends at the frame edge and leaves an exposed substrate. This requires tiling before the new screen can be installed.


How Do You Know the Installation Has Been Done Correctly?

A correctly completed shower screen installation on the Gold Coast has specific, observable characteristics. Checking these after the glazier leaves tells you whether the installation meets the standard you paid for.

  • Silicone is continuous with no voids β€” run your finger along the full length of every silicone joint: the base, both wall junctions, and the head rail ends. The bead should be smooth, consistent in width, and continuous β€” no gaps, no bubbles, no points where the bead narrows to nothing. Base corners are the most common place for voids β€” where two silicone lines intersect, one should overlap the other cleanly.
  • The door swings cleanly and closes consistently β€” open the door through its full range and allow it to close unassisted. It should swing freely without binding and close with consistent pressure along the seal edge from top to bottom. A door that catches at the top or bottom, or requires physical force to close, has a hinge alignment issue that should be corrected before sign-off.
  • Glass is plumb, not just flush β€” a glass panel set flush against an out-of-plumb wall looks correct from the front but sits at an angle relative to vertical. A correctly installed panel is set plumbΒ 
  • Compliance certificates are issued in writing β€” a Form 15 and Form 16 if required should be provided in writing β€” not verbally confirmed. If your glazier did not provide these documents, ask for them. An installation without written compliance certification has no legal standing for building inspections, insurance claims, or property settlement purposes.
  • No movement in the glass panels β€” grip the fixed panel near its upper edge and apply gentle lateral pressure. There should be no movement. Any flex or rattle in a newly installed screen indicates fixings that are not anchored in solid backing β€” a serious structural deficiency that must be corrected.

Do not use the shower for 24 hours after installation β€” the silicone applied at wall and floor junctions must cure fully before water contact. Using the shower before curing is complete compromises the seal and the waterproofing barrier. This is not a precaution β€” it is a requirement of the installation.

Final Thoughts

Shower screen installation on the Gold Coast is straightforward when the sequence is correct and the bathroom is ready. The single most important thing you can do to ensure a smooth installation is simple: book the measure appointment only when tiling is fully complete β€” grouting, wet area sealant, and all other wet area work included. Everything else in the process β€” manufacture, installation, certification β€” follows from that first accurate measurement.

The compliance certificates issued at the end of the installation are not a formality. They are the legal record that your shower screen meets Australian Standards and that the installation was carried out by a licensed glazier. Keep them with your property documents.

Gold Coast Shower Screens carries out shower screen installation across the Gold Coast β€” from the measure appointment through to compliance certification β€” for semi-frameless, frameless, and framed configurations. Contact us to book a free measure across Surfers Paradise, Broadbeach, Burleigh Heads, Robina, Southport, Nerang, Ashmore, Helensvale, Coomera, Labrador, Runaway Bay, and surrounding areas.

Visit Our Showroom

When you’re working on your home’s interior design, you’ll know how important it is to see every detail in person.

We serve both the residential and commercial markets and have a solution for all of our customers. This is why we encourage all our customers to pay a visit toΒ ourΒ Coombabah Showroom, so you can take a closer look at our product selection and choose the right items for your needs.

1300 199 480